- Aug. 2, 2023NEWPostfixes v3 for WS.WebTV 60 available
- Jun. 6, 2023NEWWS.WebTV version 60 available!
- Mar. 30, 2023Postfixes v2 for WS.WebTV 59 available


Content/Administration
Create/Edit Pages
Rev. Jun. 20, 2018Description:
Step-by-step instructions on how to create a Page in WS.WebTV.Notes:
• Version used for the screen captures: WS.WebTV Professional 3.0.1 (all extensions enabled). Some options/features might be different, respect your WebTV, depending on the installed version and extensions you have purchased.• The interface may be slightly different depending on the Web browser and operating system.
1. Goto to Channels & Pages...
2. Once on Channel & Pages...
(A) To create a Page click on "New..." button and select "Text/HTML (Page)".
(B) To edit an existing Page click the corresponding "pencil" icon.
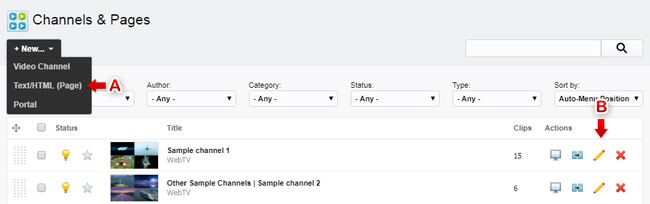
The creation and edition interfaces are very similar, however, the editing interface contains additional tabs, options and information.
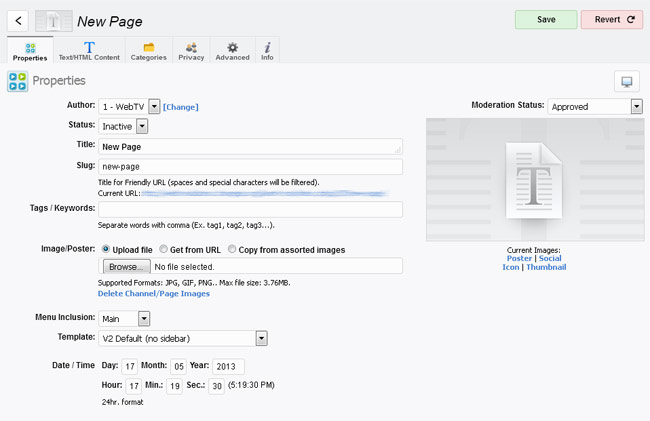
3. The Properties Tab...
On the Properties tab is where you enter the basic Page information:
• Title: Enter a descriptive Page title, as short as possible. The title will be used on the menus.
• Slug: This is for friendly URLs. You can leave this field blank and the system will generate it automatically when saving.
• Tags/Keywords: Write some representative keywords for your Page (comma-separated).
• Image: Supply an image (16:9) to use as thumbnail.
Drag and Drop Tip:
If you are using recent versions of Chrome/Safari, Firefox or Opera, you can drag and drop your image file to the image field.
• Menu Inclusion: Select the menu(s) where this Page can be included.
• Template: Select one among the avilable templates for the Page (if any). WS.WebTV can handle multiple templates for Pages.
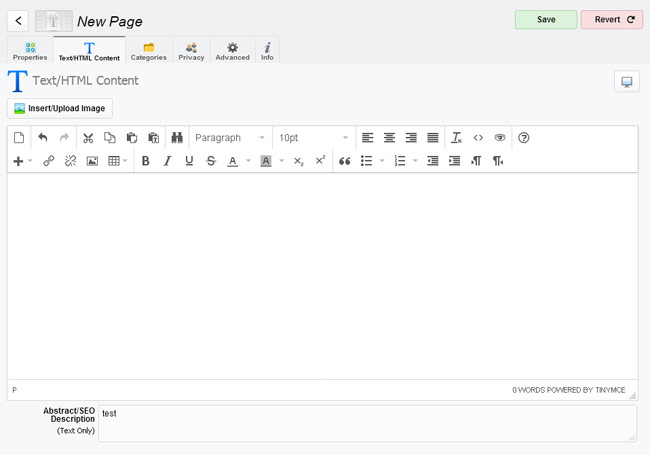
4. The "Text/HTML Content" Tab...
On this tab is where you enter the desired information. As you can see, we have included the popular TinyMCE editor that allows you to apply format to your content, easily.
• Abstract/SEO Description: This description will be used for SEO and as excerpt when listing the Page on search result pages.
Advanced HTML usage (General):
Always use absolute URLs for images. Example:
<img src="http://www.webtvsolutions.com/images/my_image.jpg" alt="">
Advanced HTML usage (Mobile Interface extension):
1. If you wish the size of an image to be automatically adjusted so it is displayed correctly on the Mobile interface, use the mobileFix class; example:
<img src="http://www.webtvsolutions.com/images/my_image.jpg" alt="" class="mobileFix">
2. If you wish certain element to be visible on the "Desktop" interface and another on the "Mobile" one, use the mobile and desktop classes. Examples:
<div class="desktop">This DIV will only be visible on the Desktop interface</div>
<div class="mobile">This DIV will only be visible on the Mobile interface</div>
5. Done editing...
Once you are done editing the Page, click the Save button.
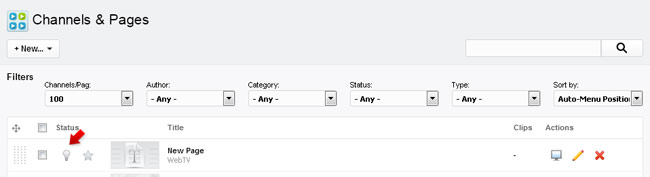
6. Activating a new Page...
New Pages are inactive by default. In order to activate the Page, return to the Channels & Pages list and click the "gray light bulb" icon (it will turn to yellow when active).